Active Directory Setup | Windows Server, VirtualBox, RAS NAT

In this lab, we'll configure Active Directory in Windows Server 2016, then create user accounts then configure the connection and networking in the domain group.
to get more information about what Active Directory is, you can check out this article Active Directory.
Project steps
- Download and install VirtualBox and Extension Pack
- Download Windows 10 and Windows Server 2019
- Install Windows Server 2019
- Configure the VM
- Configure Active Directory (RAS/NAT, DHCP, Routing)
- Create 100 users and add them to the domain using PowerShell script
Let's begin
1/ Download and install VirtualBox and Extension Pack
you can download and install it from the official site: virtualbox.org/Downloads
else, if you're using Kali Linux, you can use these commands:
- update and install the package lists
sudo apt update && sudo apt full-upgrade -y
- import VirtualBox’s repository key
wget -q https://www.virtualbox.org/download/oracle_vbox_2016.asc -O- \
| gpg --dearmor \
| sudo tee /usr/share/keyrings/virtualbox-archive-keyring.gpg
- add VirtualBox repository to source list
echo "deb [arch=amd64 signed-by=/usr/share/keyrings/virtualbox-archive-keyring.gpg] http://download.virtualbox.org/virtualbox/debian buster contrib" \
| sudo tee /etc/apt/sources.list.d/virtualbox.list
- update the source list again
sudo apt update
- make sure the VirtualBox kernel modules are kept up-to-date when the Kali kernel gets updated
sudo apt install dkms -y
- install VirtualBox & Extension Pack
sudo apt install virtualbox virtualbox-ext-pack -y
2/ Download Windows 10 and Windows Server 2019
go to microsoft.com/evaluate-windows-server-2019, choose ISO, and continue


do the same with Windows Enterprise 10
it's better to install windows 10 Pro if you have 8GB of RAM or less
Ps: Windows 11 requires 4GB of RAM
you can download it from here microsoft.com/windows10ISO
3/ Configure the VM
go to New
name it
type: Microsoft windows
version: Other Windows (64-bit)
type: Microsoft windows
version: Other Windows (64-bit)

memory size: at least 2GB of RAM

choose "Create a virtual hard disk now"

choose "VDI"

choose "Dynamically allocated"


Now go to Setting

go to General > Advanced
Shared clipboard: bidirectional
Drag'n'drop: bidirectional
Shared clipboard: bidirectional
Drag'n'drop: bidirectional

Storage > Empty > Optical Drive
choose the Windows Server's ISO
choose the Windows Server's ISO

Network > Adapter 1: NAT

Network > Adapter 2: Internal Network
OK

4/ Windows Server 2019 installation
after setting up the VM, double click on the VM to start installing Windows Server
first, select your favorite language and keyboardNext
then hit "Install Now"

select “Standard Evaluation (Desktop Experience)” comes with the GUI

Next
Accept Licence
Next
Accept Licence
Next
choose "Custom: install Windows only"

choose New > Apply > Next


5/ Windows Configuration (Networking)
after the installation's completion, it will start a basic configuration
give a password (8 letters, one upper and one number at least)

to unlock: Input > Keyboard > insert Ctrl-Alt-Del

Allow Public Network: Yes
Devices > Insert Guest Additions CD image > Download it


wait for the download to complete then go to My PC and install “VBoxWindowsAdditions-and-64.exe”

after the installation is completed, shut down the VM and start it again; you can use it on full screen now
click on the network icon on the taskbar

Change adapter options

there are two connections: Ethernet and Ethernet 2, they are the two adapters we configured before (NAT & local)

when you look for the Ethernet's details you'll notice that it has a private IP address provided by your home router, this connection is the provider of the internet connectivity

when you look for the Ethernet's details you'll notice that it has a private IP address provided by your home router, this connection is the provider of the internet connectivity
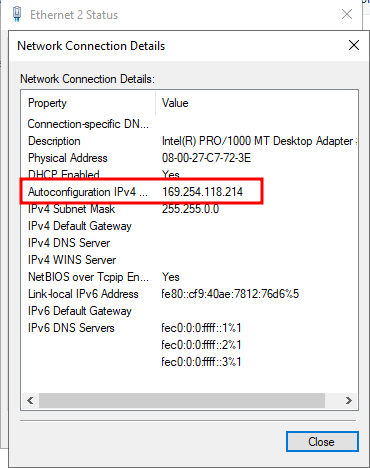
assign an IP address for the internal connection
right-click > Properties > select IPv4 > Properties > assign a class C IP, a mask, and a DNS server that points to the machine itself (localhost), it's 127.0.0.1, or just repeat the IP address of the machine

rename them

rename the PC
right-click on the Windows icon > System > Rename this PC > choose a name and restart now
right-click on the Windows icon > System > Rename this PC > choose a name and restart now

6/ AD Installation
go to the search bar and look for Server Manager

Add roles and features

Next
select Role-based or feature-based installation
Next
select Role-based or feature-based installation
Next

choose the server you're working on now since it's the only one

select active directory domain services
Next > Install
Next > Install


now, we just installed the AD domain services, but we didn't create the domain yet
choose promote this server to a domain controller

choose "Add a new forest"
name it
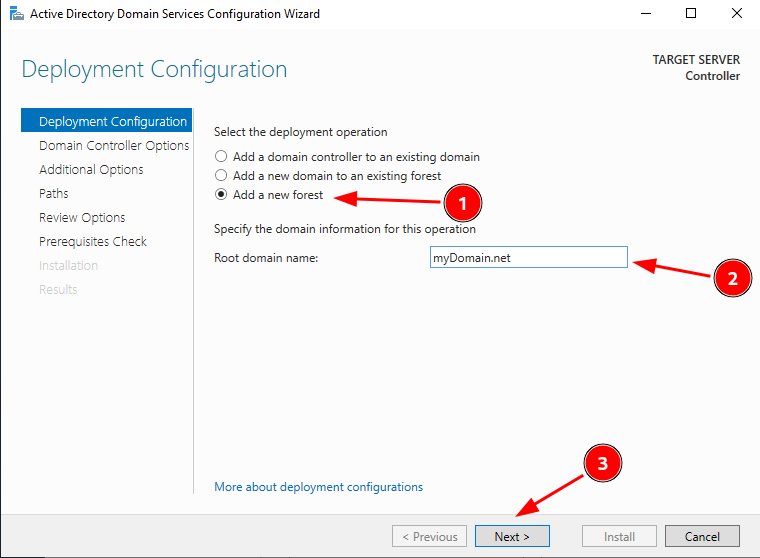
check the DNS server capability
set a restore mode password
Next
leave the DNS Options, Additional Options, Paths, Review options as they are
Install
After the installation (it may take a couple of minutes), the PC will restart automatically

after restart, you'll notice the login account changed to "your_domain_name/Administrator

open the Start menu > Windows Administrative tools > ActiveDirectory Users and Computers

right-click on your domain name from the left list > New > Organizational Unit

name it and click Ok

right-click on the object you just created > New > User

insert the user's name, login name, and hit Next

now, create a password, check the options you want to apply for users according to the company's password policy:
- if you assign a default password for all users, check this box so that the user change it on the first logon
- if you have control over the users' passwords
- this option is used most of the time only in labs
- when the user has not entered the company yet, you can prepare the account for him before he comes in

now you need to add the user to admin group
double click on the user > Member Of > Add > Domain Admins > Ok > Ok
double click on the user > Member Of > Add > Domain Admins > Ok > Ok


logout
select "Other user" and insert your credentials to verify

now, we need to install "Remote Access" services
so go to roles and features like we did before


select routing and RAS
Next > Install

go to Tools in the up-right corner
choose routing and remote access
choose routing and remote access

choose the first option: Configure and Enable Routing and Remote Access

Next
we want to use NAT to allow internal clients to connect to the internet using one public IP address
we want to use NAT to allow internal clients to connect to the internet using one public IP address

select the external interface that connects to the internet
Next and Finish
Next and Finish

as you can see, the color is changed to green,
you can see the routing configuration menu under the server's name

now, we will set up a DHCP server
to do so, enter to “Add Roles and Feature” menu again
select “Role-based or feature-based installation” like we did before
Next > Install
to do so, enter to “Add Roles and Feature” menu again
select “Role-based or feature-based installation” like we did before
Next > Install

wait for the installation to finish and close the wizard window
get back to the Tools menu > DHCP
get back to the Tools menu > DHCP

right-click on the IP4 menu > New Scope > Next

name it (ex: with the range, you want to use)

set the start and end IPs and the subnet mask to 24

Next
leave the exclusions options as it is > Next
leave the exclusions options as it is > Next

add the IP address of the NAT controller (the gateway) > Add > Next until the end > Finish

right-click on the Controller > Authorize & Refresh

we need to use the internet so we must configure Internet Explorer
go to Configure this local server
go to Configure this local server

turn off IE Enhanced security


go to the Start menu and open Windows PowerShell ISE as administrator

type: Set-ExecutionPolicy Unrestricted > yes to all

change the working directory: cd C:\Users\"your user account"\Downloads\AD_PS-master\AD_PS-master

the script will create an Organizational Unit and add the accounts from the names.txt file
Click Open and look for the downloaded script

go to Tools > Active Directory Users and Computers, you can find the added users

follow the same steps we already did when you created the Windows Server VM
New VM > name it and select your Windows version > Next > Finish
go to Settings > Advanced > set Shared Clipboard and drag'n'drop to Bidirectional
go to Network > Attached to Internal Network

double click on the VM > browse to your Windows ISO file
you just need to install Windows 10 the same way you installed Windows Server before
choose your location and keyboard
skip adding a second keyboard
choose “Domain join instead”
skip adding a second keyboard
choose “Domain join instead”

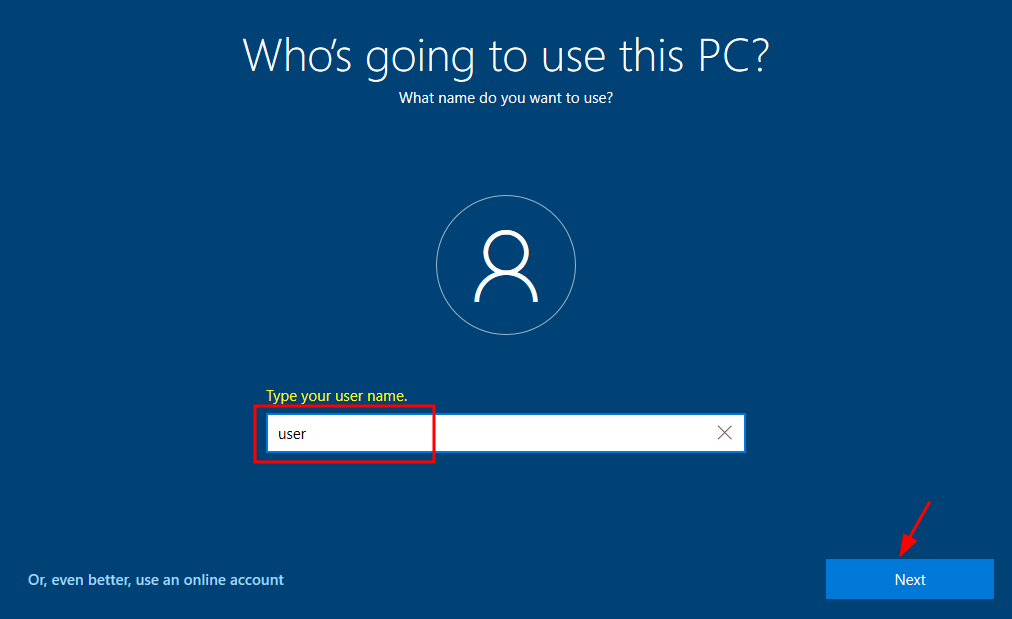
type any username > Next > leave the password blank > Next
turn off all options as you won't need any of them > Accept
"Not now" to Cortana settings

you will see your IP address (172.32.0.10) allocated by the Windows server (172.32.0.1)

go to Windows Server VM > Tools > DHCP > IPv4 > Scope > Address Leases to verify

now we need to add this Client to the domain we created earlier
right-click on the start menu > System
right-click on the start menu > System

scroll down to "Rename this PC (Advanced)"
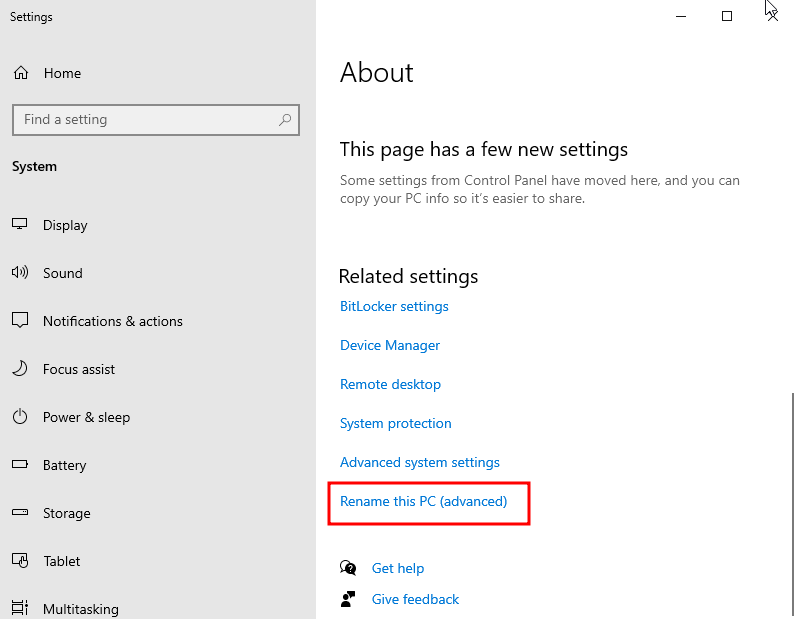
Change > name the computer > insert your domain name below > Ok


enter your username and password “Pass0worD” > Ok


you need to restart the computer now
go back to your Windows Server VM > Start menu > Windows Administrative Tools > Active Directory Users And Computers
go back to your Windows Server VM > Start menu > Windows Administrative Tools > Active Directory Users And Computers

go to computers tab, you can see our Windows computer has joined the domain

you can log in using any of the accounts from the names inserted before

Windows will prepare the client's environment for the new client

verify the username you just logged in with

Congratulations, you finished the Lab
I want to thank Josh Madakor for the very great content he's providing
I hope you enjoyed this tutorial as I did; if you have any questions feel free to ask them in the comments below, I'll be happy to answer them all
to the next time, keep calm & keep learning ...


Comments
Post a Comment