Azure Sentinel: Use Microsoft's SIEM to map global attacks

in this tutorial, we will display attacks from all over the globe on a world map using Microsoft cloud SIEM (Security Information and Event Management)
this is a step-by-step guided lab so it will be a long tutorial.
Project steps
this project needs multiple stages to be completed, when you finish this guide you will be able to:
- create and configure a Virtual Machine using Azure
- configure a cloud network security group and create firewall rules
- create and configure a Logs Analytics Workspace
- collect data from Virtual Machines into Azure
- get familiar with PowerShell scripting and APIs
- use (KQL) Kusto Query Language (the Azure data exporter language)
Let's get started
First of all, go ahead and create a free Azure account at https://azure.microsoft.com/en-us/free/
When you're done with that go to your dashboard at https://portal.azure.com/

Ps: Just a quick note before we begin, you will notice in Azure as in GCP or AWS that the search bar is your best friend, so we'll take advantage of it all the time.
Now, go to the search bar and search for virtual machines, then click on Create > Virtual Machine


now create a resource group, this is considered as your working directory, just name and select it
next, you need to fill in the appropriate fields:
- Name your VM
- Select a region (select the one near to you)
- Select Window 10 Pro image
- Choose the password authentication method
- Create a username and password (you will use them later to access the VM)

leave Disks options as they are and click next
select the advanced option under “NIC network security group”

under the network security group, create new configuration

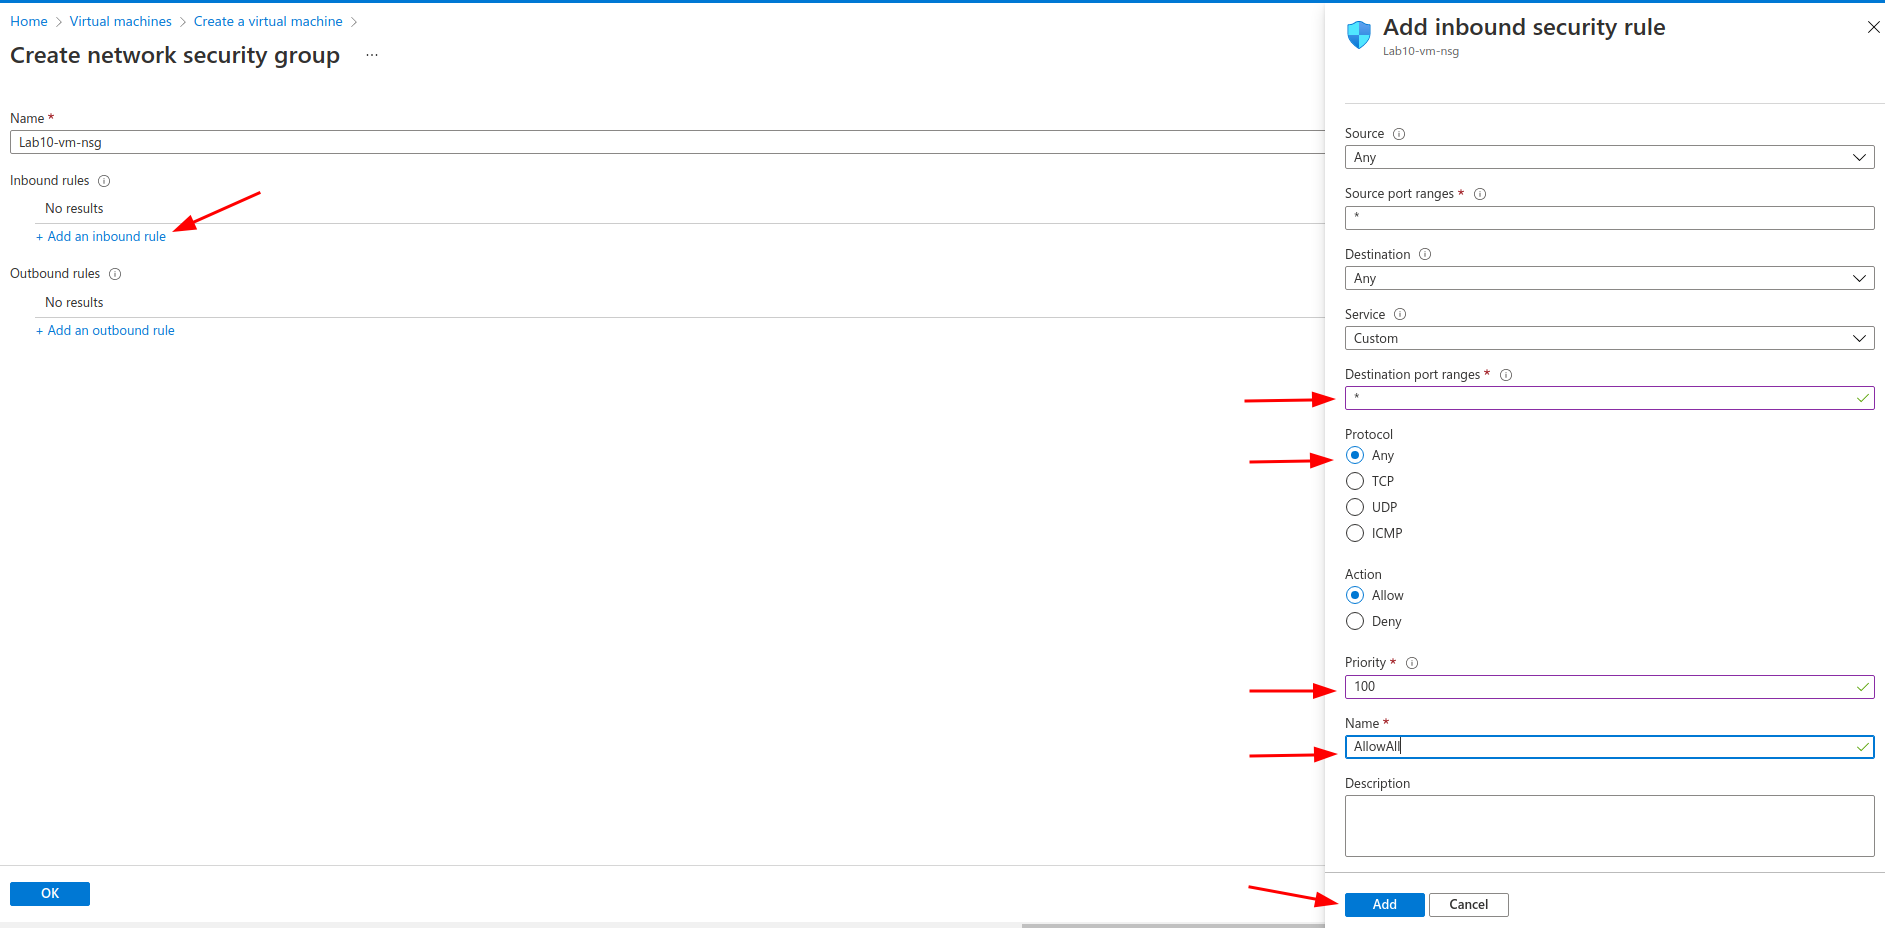
click on add an inbound rule:
- set the source and the destination ports on * (anything)
- select the minimum priority (100)
- give it a name and hit Add
continue with default settings until the finish : ok > ok > review and create > create
now we'll wait for the deployment to finish, it will take several minutes

while waiting, go to the search bar and type log analytics workspaces


fill the log analytics workspace information
- choose the resource group you've created earlier
- name the instance
- select the same region as before
- click on Review & Create then Create

next, return to the search bar and look for Microsoft Defender for Cloud
click upgrade and go to the Environment settings tab


turn off SQL servers on machines and save

go to the Data collection menu on your left
choose all Events and save
choose all Events and save

go back to log analytics workspaces (use the search bar)
select the log instance > virtual machine tab > select your VM
select the log instance > virtual machine tab > select your VM

click connect to link the log workspace with your VM

we're finished setting up the virtual machine
////////////////////////////////////
now it's time for the SIEM part
search for Microsoft Sentinel and hit create

select the log space to attach it with Sentinel

get back to the virtual machine menu, enter your VM, and copy its public address

open your favorite remote desktop viewer (Vinagre or KRDC if you're using Linux or the built-in RDC in Windows) and past the IP address

fill in your username and password and click authenticate

now you are inside your Windows VM
if you're prompted to add a public network click yes
if you're prompted to add a public network click yes

go to the start menu and search for Event Viewer
once you're inside go to Windows logs > Security to view failed login logs (ID = 4625)

you can try and connect with a false password and then reconnect again to see the log


in order to get the locations that we'll use in the map later
you need to go to ipgeolocation.io and sign up for an account
you need to go to ipgeolocation.io and sign up for an account

copy your API key to the clipboard

you can download the script at github.com/AhmedBlh/SentinelSOARLab

open PowerShell ISE > new script > paste the code > replace the API_KEY value with your key and run the script

open Windows Run > search for C:\ProgramData\failed_rdp.log

copy the content of the file to a text file and save it, you'll need it later
go to Log Analytics workspaces > your log instance > Custom logs > Add custom log

name it and click create

now we can see the logs generated by the Windows VM
select logs from the side menu
search for: SecurityEvent | where EventID == "4625" (failed login logs) select logs from the side menu

to see the result of the custom log we've just created fill the query bar with the name you chose before and hit Run it takes time to get the results
after quite a bit here's the result

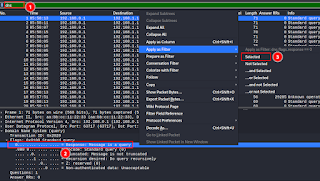
expand any log example from the list below > three dots > extract fields

just select the latitude value > a pop-up window will appear > name it and set the field type to numeric then click extract

do the same thing with the rest of them

Ps: ipgeolocation.io can provide geolocation information for 1000 IPs per day, you may think that this number is enough, but it's not enough when your IP becomes more detected worldwide.
re-run the query to view new logs (only the new logs will fill in the created fields) because old ones were for training solely

now its time to create our map
go to Microsoft Sentinel > Workbooks > Add workbook
go to Microsoft Sentinel > Workbooks > Add workbook

remove the two items (Edit > three dots > Remove)

create a new query (Add > new query)

the query looks like this (just replace variables with your own)
| summarize event_count=count() by sourceHost_CF, Lat_CF, long_CF, label_CF, destinationHost_CF
| where destinationHost_CF != ""
run query > visualization > map
change layout settings (location = Latitude/Longtitude) > select the proper variables set the metric settings > apply > save and close

set auto-refresh to On (5 or 10 min) and save

Here you have it,
Congratulations you just finish setting up your VM attacks map
I hope you enjoyed and learned something out of this tutorial, just a quick piece of advice, if you didn't fully grasp something just do it again, the only obstacle is time nothing else
Lastly, go and check Josh Madakor's repo here github.com/joshmadakor1/ and don't forget to give him a thumbs up
Keep learning . . . .


Comments
Post a Comment